
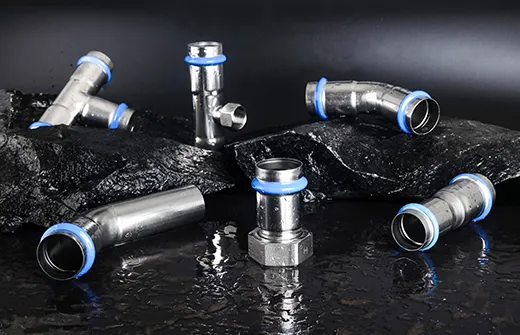
How to Install Slip Couplings: A Step-by-Step Guide for Optimal Performance
Jul 07,2026
How to Install Slip Couplings: A Step-by-Step Guide for Optimal Performance
In the world of plumbing and construction, achieving a secure and reliable connection is crucial. Slip couplings offer an efficient solution for joining two sections of pipe, particularly when working with stainless steel construction pipes. In this guide, we will provide detailed steps to install slip couplings effectively, ensuring durability and performance in your projects.
Table of Contents
- 1. Understanding Slip Couplings and Their Uses
- 2. Required Tools and Materials
- 3. Preparing the Pipe for Installation
- 4. How to Install Slip Couplings: Step-by-Step
- 5. Common Mistakes to Avoid When Installing Slip Couplings
- 6. Testing the Installation for Leaks
- 7. Maintenance Tips for Slip Couplings
- 8. Frequently Asked Questions
1. Understanding Slip Couplings and Their Uses
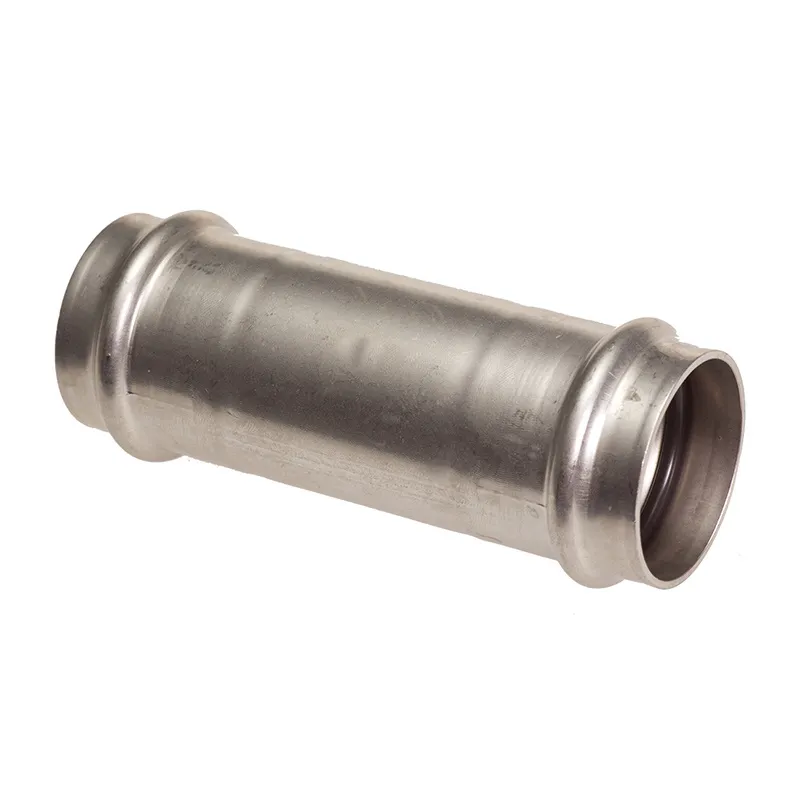
Slip couplings are simple yet effective fittings used to connect two lengths of pipe. They allow for easy adjustment in length and alignment, making them an ideal choice for various applications, including plumbing, gas lines, and drainage systems. When working with stainless steel construction pipes, these couplings provide enhanced durability and resistance to corrosion, ensuring a long-lasting connection.
The Advantages of Using Slip Couplings
- **Flexibility**: Slip couplings can accommodate slight misalignments and variations in pipe length.
- **Easy Installation**: Their design simplifies the connection of pipes without the need for additional fittings or welds.
- **Durability**: Made from high-quality materials, slip couplings are built to withstand harsh conditions.
2. Required Tools and Materials
Before beginning the installation, gather the necessary tools and materials to ensure a smooth process:
Tools Needed
- Pipe cutter or hacksaw
- Deburring tool
- Tape measure
- Marker
- Pipe wrench
- Safety goggles and gloves
Materials Required
- Slip couplings (specifically designed for stainless steel pipes)
- Pipe sections (ensure compatibility with the slip couplings)
- Pipe sealant or thread tape (optional, depending on the application)
3. Preparing the Pipe for Installation
Proper preparation of the pipe is essential for a successful installation. Follow these steps to ensure the pipe ends are ready for the slip coupling:
Step 1: Measure and Cut the Pipe
Use a tape measure to determine the required length of the pipe. Mark the cutting point clearly with a marker. Using a pipe cutter or hacksaw, cut the pipe at the marked location, ensuring a straight cut for a better seal.
Step 2: Deburr the Pipe Edges
After cutting the pipe, deburr the edges using a deburring tool. This process removes sharp edges and ensures a smoother surface for the slip coupling, reducing the risk of leaks.
4. How to Install Slip Couplings: Step-by-Step
Now that the pipes are prepared, it’s time to install the slip couplings. Follow these detailed steps for a successful installation:
Step 1: Align the Pipes
Position the two pipe sections you wish to connect, ensuring that they are properly aligned. The ends of the pipes should be close together to allow for the slip coupling to fit over them.
Step 2: Insert the Slip Coupling
Slide the slip coupling over the end of one pipe. Ensure that the coupling is positioned correctly to cover both pipe ends. The coupling should be able to slide freely but should fit snugly.
Step 3: Adjust the Position
With the slip coupling in place, adjust the position of both pipes to ensure that they are perfectly aligned. This step is crucial, as any misalignment can lead to leaks or other issues in the future.
Step 4: Secure the Coupling
If your slip coupling requires any fastening, use a pipe wrench to tighten it securely. For additional security, apply pipe sealant or thread tape to the threads of the coupling before securing it.
Step 5: Check for Movement
After securing the coupling, gently tug on both pipe sections to ensure they are firmly connected. There should be no movement or separation between the pipes.
5. Common Mistakes to Avoid When Installing Slip Couplings
To achieve a successful installation, be aware of these common pitfalls:
Over-tightening the Coupling
While it’s important to secure the coupling, over-tightening can damage the coupling or the pipes, leading to leaks.
Neglecting to Deburr
Failing to deburr the pipe edges can result in an improper seal, increasing the risk of leaks.
Misalignment
Ensure that the pipes are properly aligned before securing the coupling. Misalignment can lead to joint failure and costly repairs.
6. Testing the Installation for Leaks
Once the installation is complete, conducting a leak test is essential. Follow these steps to ensure your slip coupling is secure:
Step 1: Turn on the Water Supply
If applicable, gradually turn on the water supply to the newly installed pipes.
Step 2: Inspect for Leaks
Carefully inspect the joint where the slip coupling connects the pipes. Look for any signs of dripping or moisture.
Step 3: Apply Pressure
If you’re working with pressurized systems, apply the appropriate pressure and check for leaks again.
7. Maintenance Tips for Slip Couplings
To ensure the longevity and reliability of your slip couplings, follow these maintenance tips:
Regular Inspections
Periodically check the couplings for signs of wear, corrosion, or leaks. Early detection can save you from costly repairs.
Keep Connections Clean
Ensure that the areas around the slip couplings are clean and free from debris. This prevents build-up that could compromise the seal.
Follow Manufacturer Guidelines
Always adhere to the manufacturer's recommendations regarding installation and maintenance for the best results.
8. Frequently Asked Questions
What is a slip coupling?
A slip coupling is a type of fitting that allows for the connection of two sections of pipe by sliding over their ends. They are used in various applications, especially in plumbing systems.
Can slip couplings be used with any type of pipe?
Slip couplings are designed for specific pipe materials. Ensure compatibility, especially when working with stainless steel or other materials.
How do I know if my installation is correct?
After installation, conduct a leak test by turning on the water supply and inspecting the joint for leaks.
What tools do I need for installing slip couplings?
You will need a pipe cutter, deburring tool, tape measure, marker, pipe wrench, and safety gear like gloves and goggles.
Are slip couplings reusable?
While slip couplings can be reused, it’s essential to inspect them for damage before reinstallation to ensure a proper seal.
Conclusion
Installing slip couplings can be a straightforward process when approached with the right tools and knowledge. By following this step-by-step guide, you can ensure a secure and reliable connection for your stainless steel construction pipes. Remember to conduct regular maintenance and inspections to prolong the lifespan of your installations. With the right techniques and care, you can achieve optimal performance in your plumbing or construction projects.
Latest News
Contact Information
Mobile/WeChat: +8613396691363
WhatsApp: +8613396691363
E-mail: warrior.wang@zjipcpiping.com
Address:Floor 47, Building A, International Trade Center, Ningbo Chamber of Commerce, No.558 of Taikangzhong Road, Yinzhou District, Ningbo, 315100 China
Follow Us on


SAF Coolest v1.3.1.1 设置面板 JPMSX-AVEW-UZZVE-ZSA
违禁词: 第一,最,一流,领先,独一无二,王者,龙头,领导者,极致,
无数据提示
Sorry, the current column is being updated, please stay tuned!
You can view other columns or return to the HOME